Quick answer: A dimensional mocha balayage is planned by keeping depth through the brunette base and placing softer, lighter ribbons where they create movement. The key skills are consultation, section mapping, controlled saturation, a blended root transition and safe colour assessment—not copying a fixed formula.
Why this lesson now: Pinterest's 2026 Beauty Trend Report, published 6 October 2026, lists the search phrase “mocha balayage hair” at +949%. This is a reported search-growth signal, not a search-volume figure or a claim that it is the world's number-one trend. Recent professional beauty coverage also describes mocha balayage as a current autumn/winter brunette direction.
Learning objectives
- Translate a colour reference into a realistic consultation and placement plan.
- Map a brunette base, lighter ribbons and a soft root transition.
- Choose section size and direction to control contrast and visual movement.
- Recognise when hair history or condition makes lightening unsuitable.
- Apply salon hygiene, allergy-testing and processing safeguards.
Level and prerequisites
Level: Intermediate, for beauty learners and supervised salon trainees. Familiarity with basic colour theory, consultation, clean sectioning and reading technical instructions is recommended. Chemical colour and lightening services should be performed by appropriately trained professionals; this lesson is not a home bleaching guide.
Generic tools and setup
- Sectioning comb, clean clips and a tint brush.
- Non-reactive mixing bowls and the chosen colour system's measuring tools.
- Foils or a suitable balayage board, selected for the planned technique.
- Protective gloves, cape, skin barrier protection where directed, timer and clean towels.
- Consultation record, shade swatches, strand-test notes and adequate salon ventilation.
Video demonstration
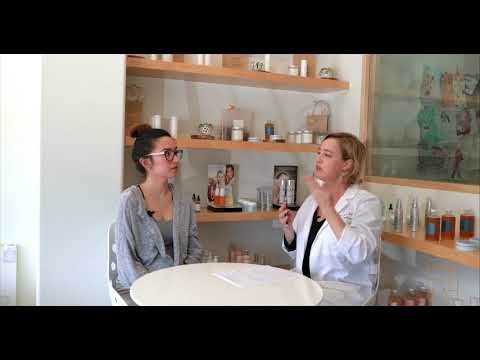
Watch Dimensional Suede Brunette, a professional colour-placement demonstration featuring Larisa Love for Joico. Use it to study sectioning, tonal contrast and the root-shadow concept; it is a reference demonstration, not a universal formula.
Publisher and video credit: Joico — Dimensional Suede Brunette, featuring Larisa Love. The original privacy-enhanced YouTube player is embedded above. Browser playback and caption-track availability have not been independently tested in this run.
Technique: plan a dimensional mocha result
1. Consult before choosing the colour map
Ask what the learner or client means by “mocha”: cooler espresso depth, neutral chocolate, or warmer coffee-and-caramel ribbons. Record the starting level, previous colour services, chemical history, natural texture, desired maintenance and the amount of contrast that feels appropriate. Use reference images to discuss placement and tone rather than promising an identical result.
2. Assess the hair canvas
Check porosity, elasticity, density, previous lightening, artificial colour build-up and visible damage. Perform the required strand assessment before planning any lightening. If the hair is compromised, the history is unclear or the strand response is unsuitable, pause and choose a safer non-lightening plan or refer to a more experienced colourist.
3. Draw the placement map
Divide the head into workable zones: nape, sides, crown and face-framing area. Decide where depth should remain and where light should appear when the hair is worn down, tied back or parted differently. Keep the face frame intentional and avoid placing every bright ribbon at the same height.
4. Build soft ribbons with controlled variation
Use a deliberate mix of fine weaves and slightly broader sections to create movement rather than uniform stripes. Keep subsections consistent, maintain clean separation and control saturation. The placement method—freehand, board or foil—must suit the hair assessment and the chosen professional system. Do not let colour overlap onto previously lightened areas without a clear plan.
5. Blend the root transition
A root shadow or root melt is a tonal transition, not a dark band. Select a compatible depth and undertone, keep the application controlled and soften the meeting point between the natural base and lighter ribbons. Avoid dragging a deep tone too far through the lengths, which can flatten the dimension.
6. Monitor, rinse and refine
Follow the exact manufacturer's mixing, timing and removal instructions for the chosen system. Check the hair at the intervals specified; never extend the processing time to chase a lighter result. Rinse thoroughly, assess the exposed tone and use a compatible gloss or toner only when the hair assessment supports it. Record the final placement and any adjustments for future consultation.
7. Review the result in movement
Dry and style gently, then inspect the blend in natural and indoor light. Look for abrupt lines, uneven ribbons, over-lightened ends and areas that disappear when the hair moves. Photograph the result only with consent and use the review to improve the next placement map.
Common mistakes to avoid
- Choosing a shade from a trend photo without checking the starting base and hair history.
- Using identical section widths everywhere, which can create stripes instead of dimension.
- Over-saturating or allowing overlap on fragile, previously lightened lengths.
- Making the root shadow too dark or extending it too far down the hair.
- Ignoring strand-test results, manufacturer timing or signs of irritation.
- Promising the same finish across different textures, porosities and starting colours.
Hygiene, allergy and chemical safety
- Follow the chosen system's full safety instructions and perform the required skin allergy-alert test before each colouring service. The US FDA hair-dye guidance advises a skin test before use and describes a 48-hour observation period; always follow the specific label and local rules.
- Do not proceed if a test causes a rash or if there is a history of a hair-colour reaction. The NHS hair-dye reaction guidance explains that symptoms can be delayed.
- Wear suitable gloves, protect clothing and surfaces, keep the work area ventilated as required by the safety data, and clean tools and work surfaces between clients.
- Never mix separate colour systems unless their instructions explicitly allow it. Do not exceed the stated processing time, keep colour away from eyes, and never use ordinary hair dye on eyebrows or eyelashes.
- Do not apply colour to an irritated, sunburned or damaged scalp. Stop immediately if burning, swelling, breathing difficulty or another concerning reaction occurs and seek appropriate medical help.
Practice assignment
On a mannequin or a paper head map, sketch six zones and mark three levels of visual brightness: preserved depth, medium ribbons and brighter face-framing accents. Write a short consultation note explaining why each ribbon sits where it does. Then review the plan with a qualified educator before any chemical application. Do not practise lightening on a person without the required training, testing and supervision.
Related free lessons
- Professional Hair Consultation & Styling
- Salon Hygiene & Infection Prevention
- Beauty Client Consultation & Professional Portfolio
Frequently asked questions
Is mocha balayage one fixed shade?
No. It is a family of brunette looks. The balance can be cooler, neutral or warmer depending on the starting base, undertone and desired contrast.
Can every brunette safely lighten to this look?
No. Previous colour, porosity, condition and strand-test response matter. Some hair histories need a staged plan or no lightening at all.
Does a root shadow mean the roots should look very dark?
No. The goal is a soft transition that preserves depth without creating a visible band.
Trend and learning sources
- Pinterest Beauty Trend Report 2026 — published 6 October 2026; reports growth for “mocha balayage hair”.
- Marie Claire: Mocha Balayage Hair Colour Ideas — recent professional commentary on tonal customisation and placement.
- Joico professional colour demonstration — video publisher and technique reference.
- US FDA: Hair Dye Safety and NHS: Hair Dye Reactions — safety information.
Featured image credit: Photo by Toni Guy Pondicherry via Pexels, used under the Pexels License. The photograph is an illustrative brunette salon finish; it is not a guaranteed result or a substitute for a consultation.
الدرس بالعربية: تخطيط لون موكا بالبالياج ودمج الجذور
الإجابة المختصرة: يعتمد مظهر الموكا المتدرّج على الاحتفاظ بعمق اللون البني الأساسي، ثم توزيع خصل أفتح بدرجات محسوبة لإظهار الحركة والبعد. يبدأ نجاح التقنية بالاستشارة وتحليل حالة الشعر ورسم خريطة التقسيم، وليس بنسخ تركيبة ثابتة تناسب الجميع.
لماذا نتعلم هذا الاتجاه الآن؟ أشار تقرير Pinterest Beauty Trend Report لعام 2026، المنشور في 6 أكتوبر 2026، إلى ارتفاع البحث عن عبارة “mocha balayage hair” بنسبة 949%. هذه إشارة إلى نمو البحث على المنصة وليست رقماً لحجم البحث أو دليلاً على أن الاتجاه هو الأكثر بحثاً في العالم.
أهداف التعلّم
- تحويل الصورة المرجعية إلى استشارة وخطة توزيع واقعية.
- رسم خريطة للقاعدة البنية والخصل الفاتحة والانتقال الناعم عند الجذور.
- اختيار اتجاه وحجم الخصل للتحكم في التباين والحركة.
- معرفة متى تجعل حالة الشعر أو تاريخه التفتيح غير مناسب.
- تطبيق قواعد النظافة واختبار الحساسية وسلامة المعالجة الكيميائية.
المستوى والمتطلبات السابقة
المستوى: متوسط، للمتعلّمين في مجال التجميل والمتدرّبين داخل الصالونات تحت إشراف مختص. يُفضّل فهم أساسيات نظرية الألوان والاستشارة وتقسيم الشعر وقراءة التعليمات الفنية. يجب تنفيذ خدمات الصبغة والتفتيح الكيميائي بواسطة مختصين مؤهلين؛ هذا الدرس ليس دليلاً للتفتيح المنزلي.
الأدوات العامة وتجهيز المكان
- مشط تقسيم ومشابك نظيفة وفرشاة توزيع.
- أوعية خلط غير متفاعلة وأدوات قياس مناسبة لنظام اللون المختار.
- رقائق عزل أو لوح بالياج مناسب للطريقة المخطط لها.
- قفازات واقية وغطاء حماية ومؤقّت ومناشف نظيفة.
- سجل استشارة ودرجات لونية مرجعية وملاحظات اختبار الخصلة وتهوية مناسبة للصالون.
مشاهدة التطبيق العملي
يعرض الفيديو درس Dimensional Suede Brunette من Joico بمشاركة Larisa Love. تابعي منه تقسيم الشعر وتوزيع التباين اللوني وفكرة دمج الجذور. الفيديو مرجع تعليمي لتقنية احترافية، وليس تركيبة ثابتة يجب نسخها لكل حالة.
صفحة الفيديو الأصلية ومصدره. تم تضمين مشغّل YouTube الأصلي في القسم الإنجليزي. لم يتم اختبار التشغيل الفعلي أو توافر مسارات الترجمة في المتصفح خلال هذا الفحص.
خطوات تخطيط لون موكا متدرّج
1. الاستشارة قبل اختيار خريطة اللون
اسألي عن معنى درجة الموكا المطلوبة: هل هي قاعدة إسبريسو باردة، أم شوكولاتة متعادلة، أم خصل قهوة وكراميل دافئة؟ سجّلي مستوى اللون الأساسي والخدمات الكيميائية السابقة والملمس الطبيعي والصيانة المتوقعة ودرجة التباين المرغوبة. استخدمي الصور المرجعية لمناقشة التوزيع والدرجة، لا لوعد العميلة بنتيجة مطابقة تماماً.
2. تقييم حالة الشعر
افحصي المسامية والمرونة والكثافة والتفتيح السابق وتراكم الصبغات الصناعية وعلامات التلف. أجري اختبار الخصلة المطلوب قبل التخطيط لأي تفتيح. إذا كانت حالة الشعر ضعيفة أو التاريخ غير واضح أو نتيجة الاختبار غير مناسبة، أوقفي خطة التفتيح واختاري بديلاً أكثر أماناً أو أحِيلي الحالة إلى مختص أكثر خبرة.
3. رسم خريطة التقسيم
قسّمي الشعر إلى مناطق عمل واضحة: مؤخرة الرأس والجوانب والتاج ومحيط الوجه. حددي أين يجب الاحتفاظ بالعمق وأين تظهر الخصل الأفتح عند ترك الشعر منسدلاً أو ربطه أو تغيير فرق الشعر. لا تضعي كل الخصل المضيئة على الارتفاع نفسه حتى لا يبدو اللون مخططاً.
4. توزيع خصل ناعمة بتباين محسوب
امزجي بين خصل رفيعة وخصل أعرض قليلاً لإظهار الحركة بدلاً من الخطوط المتساوية. حافظي على نظافة التقسيم وتجانس التشبّع والتحكم في كمية اللون. اختاري طريقة العمل الحر أو اللوح أو العزل وفق تقييم الشعر وتعليمات النظام الاحترافي المستخدم، وتجنّبي تداخل اللون مع أطراف سبق تفتيحها دون خطة واضحة.
5. دمج الانتقال عند الجذور
ظل الجذور أو دمج الجذور هو انتقال لوني ناعم وليس شريطاً داكناً. اختاري عمقاً ودرجة لونية متوافقة، ووزّعي اللون بتحكم مع تنعيم نقطة الالتقاء بين القاعدة الطبيعية والخصل الفاتحة. لا تسحبي الدرجة الداكنة لمسافة طويلة على الأطوال حتى لا تفقد الخصل بعدها وحركتها.
6. مراقبة المعالجة والشطف وضبط الدرجة
التزمي بتعليمات الخلط والوقت والإزالة الخاصة بالنظام المختار. افحصي الشعر وفق الفواصل المحددة ولا تزيدي وقت المعالجة للوصول إلى درجة أفتح. اشطفي جيداً، وقيّمي اللون الناتج، ثم استخدمي التونر أو الغلوس المتوافق فقط إذا كانت حالة الشعر تسمح بذلك. سجّلي التوزيع النهائي وأي تعديلات للاستشارة المقبلة.
7. مراجعة النتيجة أثناء الحركة
جففي الشعر وصففيه بلطف، ثم راجعي الدمج في ضوء طبيعي وداخلي. ابحثي عن الخطوط الحادة أو تفاوت الخصل أو تفتيح الأطراف أكثر من اللازم أو اختفاء الخصل عند حركة الشعر. لا تلتقطي صوراً للنتيجة إلا بموافقة واضحة، واستخدمي المراجعة لتحسين خريطة التوزيع لاحقاً.
أخطاء شائعة يجب تجنبها
- اختيار الدرجة من صورة مرجعية دون تقييم اللون الأساسي وتاريخ الشعر.
- استخدام أحجام تقسيم متساوية في كل المناطق، مما يصنع خطوطاً واضحة بدلاً من البعد.
- زيادة تشبّع اللون أو تداخله مع أطراف ضعيفة سبق تفتيحها.
- جعل ظل الجذور داكناً جداً أو سحبه لمسافة طويلة.
- تجاهل نتيجة اختبار الخصلة أو وقت المعالجة أو علامات التهيّج.
- وعد كل أنواع الشعر بالنتيجة نفسها رغم اختلاف الملمس والمسامية واللون الأساسي.
النظافة والحساسية وسلامة المواد الكيميائية
- اتبعي تعليمات السلامة كاملة، وأجري اختبار الحساسية الجلدي المطلوب قبل كل خدمة صبغ. توصي إرشادات إدارة الغذاء والدواء الأمريكية FDA باختبار الجلد قبل الاستخدام وتشرح فترة ملاحظة تبلغ 48 ساعة؛ اتبعي دائماً تعليمات العبوة والقواعد المحلية الخاصة بالنظام المستخدم.
- لا تكملي الخدمة إذا ظهرت استجابة في الاختبار أو كان هناك تاريخ سابق لتفاعل مع صبغة الشعر. توضح إرشادات NHS أن أعراض التفاعل قد تتأخر في الظهور.
- ارتدي القفازات المناسبة، واحمي الملابس والأسطح، وحافظي على تهوية المكان وفق بيانات السلامة، ونظفي الأدوات والأسطح بين العملاء.
- لا تخلطي أنظمة صبغ منفصلة إلا إذا سمحت تعليماتها بذلك صراحة. لا تتجاوزي وقت المعالجة المحدد، وأبعدي اللون عن العينين، ولا تستخدمي صبغة الشعر العادية للحواجب أو الرموش.
- لا تضعي اللون على فروة رأس متهيجة أو مصابة بحروق شمس أو جروح. أوقفي العمل فوراً عند حدوث حرقان أو تورم أو صعوبة تنفس أو أي تفاعل مقلق، واطلبي المساعدة الطبية المناسبة.
مهمة تطبيقية
على رأس تدريبي أو مخطط ورقي، ارسمي ست مناطق للتقسيم وحددي ثلاث درجات من الإضاءة: عمق محفوظ، وخصل متوسطة، ولمسات أفتح حول الوجه. اكتبي ملاحظة استشارة قصيرة تشرح سبب اختيار كل موضع، ثم راجعي الخطة مع مدرّب مؤهل قبل أي تطبيق كيميائي. لا تتدرّبي على التفتيح لشخص دون التدريب والاختبارات والإشراف المطلوب.
دروس مجانية مرتبطة
- استشارة الشعر والتصفيف الاحترافي
- نظافة الصالون والوقاية من العدوى
- استشارة العميلة والتواصل والموافقة
أسئلة شائعة
هل الموكا درجة واحدة ثابتة؟
لا. هي مجموعة من الدرجات البنية التي يمكن أن تميل للبرودة أو التعادل أو الدفء وفق اللون الأساسي والدرجة المطلوبة والتباين المناسب.
هل يمكن لكل صاحبات الشعر البني تفتيح الشعر بأمان؟
لا. التاريخ الكيميائي والمسامية والحالة العامة ونتيجة اختبار الخصلة عوامل أساسية. قد تحتاج بعض الحالات إلى خطة تدريجية أو إلى تجنّب التفتيح تماماً.
هل يعني ظل الجذور أن تبدو الجذور داكنة جداً؟
لا. الهدف هو انتقال ناعم يحافظ على العمق دون تكوين شريط واضح.
المصادر التعليمية والسلامة
- تقرير Pinterest Beauty Trend Report 2026 — منشور في 6 أكتوبر 2026.
- Marie Claire: أفكار لون الموكا بالبالياج — تغطية حديثة لتخصيص الدرجات وتوزيع الخصل.
- إرشادات FDA لسلامة صبغات الشعر وإرشادات NHS لتفاعلات صبغة الشعر.
حقوق الصورة: تصوير Toni Guy Pondicherry عبر Pexels، مستخدمة وفق ترخيص Pexels. الصورة مثال توضيحي لخصل بنية دافئة في صالون وليست ضماناً لنتيجة معينة.