FREE PROFESSIONAL BEAUTY COURSE · ENGLISH + العربية
Watch the YouTube lesson
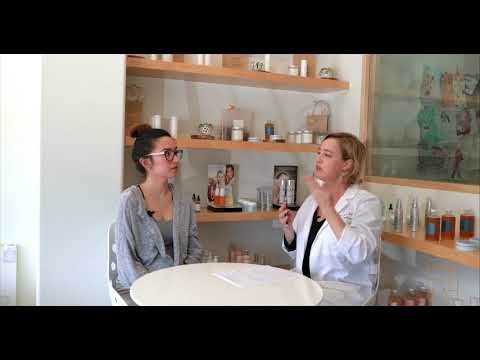
Video lesson: How To Apply Foundation — Lisa Eldridge — Lisa Eldridge. Embedded from the original YouTube channel.
Learn a repeatable, hygienic foundation routine that prioritises skin comfort, accurate shade matching and natural-looking coverage. This lesson is educational and does not replace individual dermatological advice.
What you will learn
- Prepare a clean workstation and hygienic tools.
- Observe skin finish and choose compatible preparation products without making medical claims.
- Understand undertone and test foundation shades accurately.
- Build coverage in thin, controlled layers.
- Adapt application for a natural, soft-matte or luminous finish.
Module 1 — Set up safely
Clean the work surface, wash hands and disinfect reusable tools according to their manufacturer instructions. Use disposable applicators where appropriate. Never double-dip into shared cream or liquid products. Check product labels and ask about known sensitivities before beginning. Do not work over broken, irritated or infected skin; recommend that the client seek qualified medical advice when needed.
Module 2 — Prepare the skin
Begin with a gentle cleanse appropriate to the client’s preferences, then apply a light moisturiser and allow it to settle. Use sunscreen as part of daytime skin care and follow its label. Avoid layering too many incompatible textures. Primer is optional: choose it for a specific finish or makeup-wear goal, not as a mandatory step.
Module 3 — Match the shade
Compare a small amount of several close shades along the jawline in natural, indirect daylight. The best match should blend into both face and neck. Undertone descriptions such as warm, cool and neutral are useful starting points, but real skin is nuanced. Do not select a shade from a hand swatch or rely on a screen image alone. Check the match after it settles.
Module 4 — Apply with control
Start with a small amount at the centre of the face and blend outward. Use a clean brush, sponge or fingertips according to the desired finish and hygiene requirements. Build only where more coverage is needed. Press rather than drag over textured areas. Blend the jawline and hairline carefully, then check the result in more than one lighting condition. Concealer should be placed selectively rather than used to mask every natural feature.
Module 5 — Set and finish
Use powder sparingly where shine control is needed, especially around the centre of the face. Choose setting spray only when appropriate for the products and client preference. Recheck colour, edges and transfer. Record the shade family and method only with the client’s permission.
Practical assignment
- Prepare and photograph a clean workstation without showing private client information.
- Test three nearby foundation shades at the jawline in daylight.
- Apply a thin first layer and identify only the areas needing extra coverage.
- Take a final photo in neutral light and note what you would improve.
Knowledge check
1. Where should you test foundation? Answer: along the jawline, checking face-to-neck harmony.
2. Why build thin layers? Answer: to maintain control and avoid unnecessary heaviness.
3. Should shared products be double-dipped? Answer: no.
الدورة المجانية — فن المكياج الاحترافي: تجهيز البشرة واختيار درجة الفاونديشن
تعلّم خطوات عملية للحصول على قاعدة مكياج متناسقة مع مراعاة النظافة وراحة البشرة. المحتوى تعليمي ولا يُعد بديلاً عن استشارة طبيب الجلدية.
أهداف الدرس
- تجهيز مكان العمل والأدوات بطريقة صحية.
- فهم الفرق بين الاندرتون الدافئ والبارد والمحايد.
- اختبار درجات الفاونديشن بطريقة صحيحة.
- تطبيق طبقات خفيفة ومتدرجة.
- اختيار اللمسة النهائية المناسبة.
الخطوة الأولى: النظافة والتجهيز
اغسل يديك ونظّف سطح العمل وطهّر الأدوات القابلة لإعادة الاستخدام وفق تعليمات الشركة المصنّعة. استخدم أدوات أحادية الاستعمال عند الحاجة، ولا تُدخل الأداة المستخدمة مرة أخرى في عبوة المنتج المشتركة. اسأل العميلة عن أي حساسية معروفة، وتجنب العمل على جلد ملتهب أو مصاب.
الخطوة الثانية: تجهيز البشرة
ابدأ بتنظيف لطيف، ثم استخدم مرطباً مناسباً واتركه حتى يمتص. يمكن استخدام البرايمر عند الحاجة فقط، مع مراعاة توافق طبقات المنتجات مع بعضها.
الخطوة الثالثة: اختيار اللون
اختبر درجات متقاربة على خط الفك في ضوء النهار غير المباشر. الدرجة المناسبة تندمج مع لون الوجه والرقبة. لا تعتمد على لون اليد أو صورة الشاشة وحدها، وانتظر قليلاً لملاحظة تغير اللون بعد الجفاف.
الخطوة الرابعة: التطبيق
ابدأ بكمية صغيرة من منتصف الوجه وادمج للخارج. أضف طبقات رقيقة فقط في المناطق التي تحتاج تغطية إضافية. استخدم فرشاة أو إسفنجة نظيفة، وراجع النتيجة في إضاءة مختلفة.
التطبيق العملي
- جهّز الأدوات وسطح العمل.
- اختبر ثلاث درجات على خط الفك.
- طبّق طبقة خفيفة وحدد المناطق التي تحتاج تغطية.
- راجع النتيجة وسجل ملاحظات التطوير.
اختبار سريع: أين نختبر الفاونديشن؟ على خط الفك. لماذا نستخدم طبقات رقيقة؟ للتحكم في التغطية وتجنب المظهر الثقيل.